Using DSL with pfSense and the Draytek Vigor167
Switching from a FritzBox modem router to a Draytek dedicated modem in bridge mode can be a game changer for anyone looking to take control of their home or small office network. The FritzBox, while a popular choice, can be restrictive and annoying to use, with many features locked or hidden away in menus. By using a dedicated modem in bridge mode, you can bypass these limitations and enjoy the full range of features that your router has to offer. Additionally, by using a dedicated modem, you can configure the NAT and firewall settings on your pfsense router, which will give you greater control over your network and eliminate the problem of double NAT.
Setting Draytek Vigor167 Modem to Bridge Mode
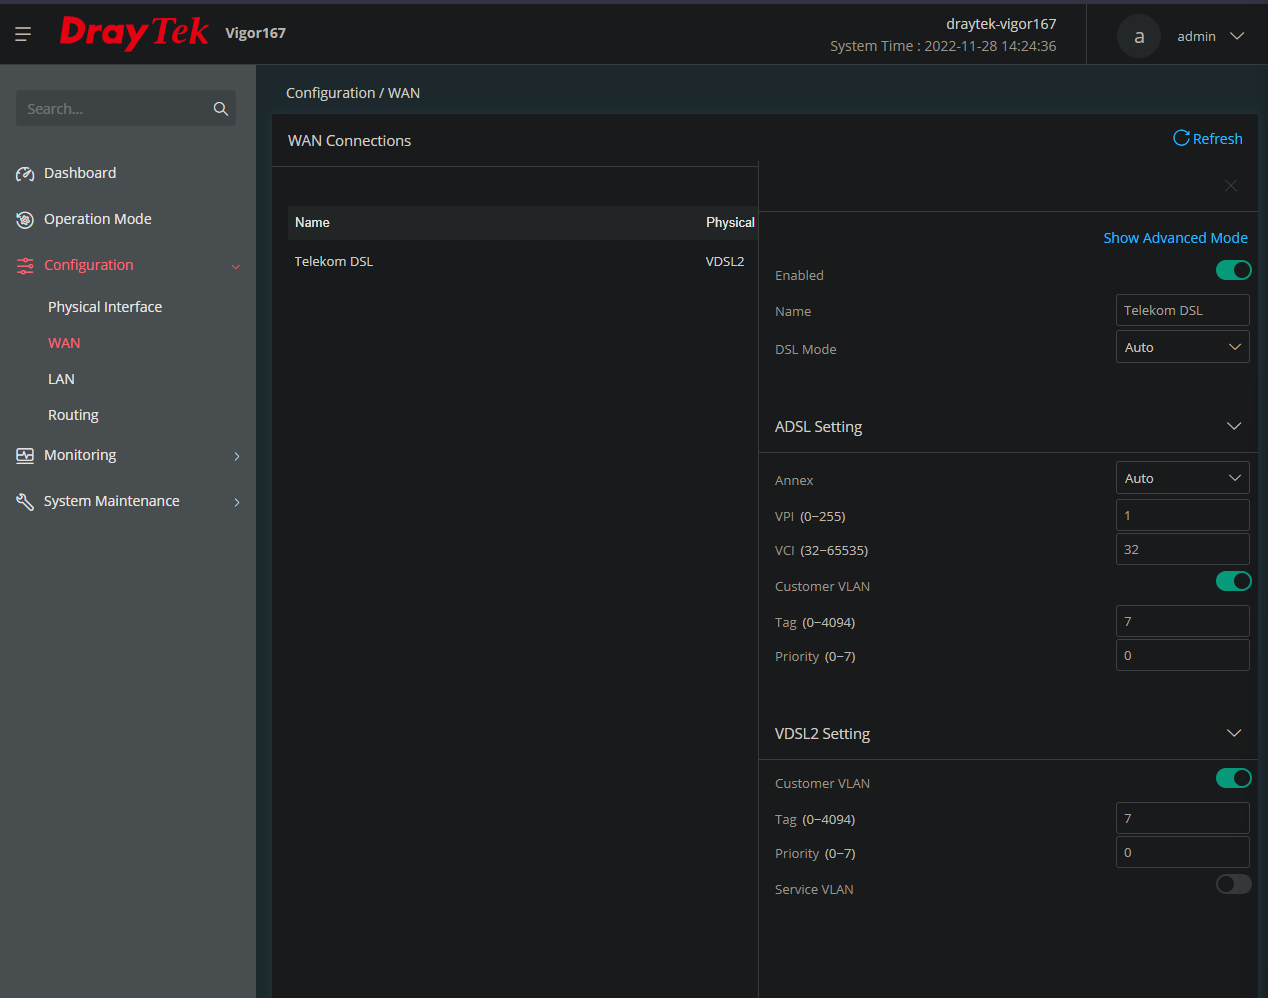
The first step in getting your network up and running is to set your Draytek Vigor167 modem to bridge mode. This will allow your router to handle all the heavy lifting, while the modem simply passes the signal through. Here’s how to do it:
- Log in to the web interface of your Draytek Vigor167 modem.
- Go to Operation Mode.
- Set mode to Modem Mode.
- Go to Configuration -> WAN and edit the connection.


Preparing Your Telekom DSL Credentials
Before you can configure your WAN port in pfSense, you’ll need to gather some information about your DSL connection. Specifically, you’ll need your username and password, as well as some information about your access number. Here’s what you need to know:
- Connection port ID
- Access number
- User suffix (usually 0001)
- Personal password
Since there are different formats for your username, depending on the length of the access number, I recommend checking out the documentation here for the exact format. Once you prepared your username and password, move on to the next step.
Configuring the WAN Port in pfSense to use DSL
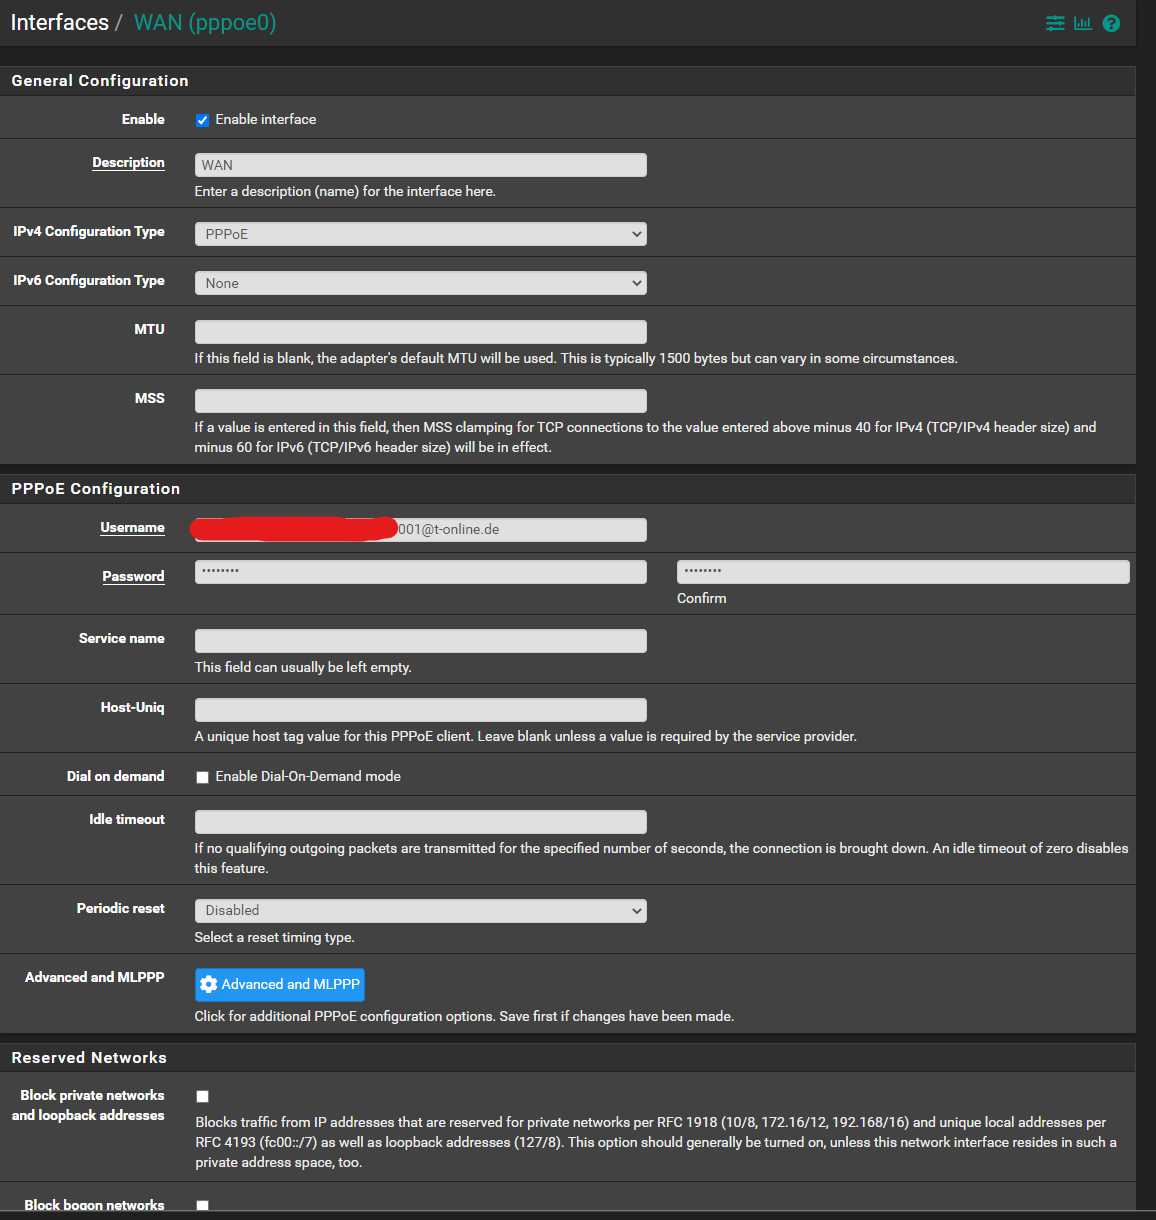
With your modem set to bridge mode and your DSL credentials in hand, you’re ready to configure your WAN port in pfSense. Here’s how to do it:
- Log in to the pfSense web interface.
- Go to Interfaces -> WAN.
- Set the IPv4 Configuration Type to PPPoE.
- Enter your username and password in the PPPoE Configuration pane.
- Save.

And that’s it! Your network is now set up and ready to go. With the Draytek Vigor167 modem in bridge mode and your WAN port configured to use DSL, you should be able to enjoy fast, reliable internet access.
If you are facing any issues or have any questions feel free to hit me up on Twitter or Discord. Happy networking!